By now you’ve probably seen your share of bowl cozy instructions, right?
Honestly, they’re all pretty similar, but I’m going to go ahead and add mine to the mix anyway. I feel like everyone’s technique is slightly different and hopefully mine speaks to someone out there.
I actually made a whole set of bowl cozies, hot pads and trivets for my mother in law for Christmas this year. The hot pads and cozies are the same in construction, just different sizes so I’m only going to explain what I did for the hot pads.
Materials:
I bought 3/4 yard of 4 different fabrics and had plenty left over…even after messing up and having to recut a few pieces. 😉
Matching 100% cotton thread. If you use polyester it could burn/melt when it touches your hot pans.
100% cotton batting. I only buy 100% cotton batting when making quilts, so I had scraps that I was able to use.
Insulbright. Again, I had scraps leftover from a previous project that I was able to use, but I did buy it from Joann’s originally.

Let’s start with the bowl cozies.
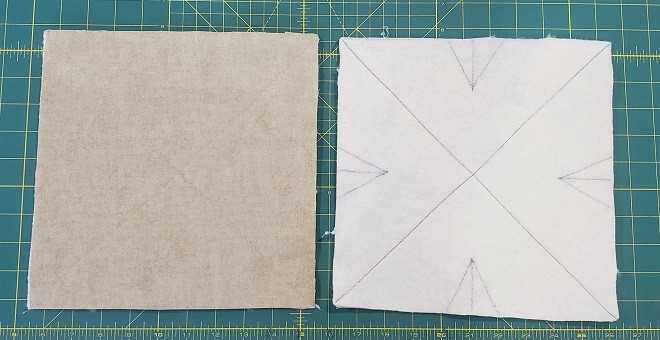
Cut 8 10″ squares out of your fabrics (2 from each one)
Cut 8 10″ squares out of batting

I mark my batting with stitch lines diagonally making an X through the middle. I use Crayola washable markers for pretty much all my markings. You could stitch them together after you’ve completed the bowl cozy, but I found the bulk is too much for me.
Next, you’ll find the middle of each side and mark 2″ up and 1″ on either side, making a triangle for your dart.

Place your batting onto the wrong side of each square of fabric and sew on the diagonal lines.
Now fold your square in half, right sides touching so your dart is folded and sew along your marked lines.
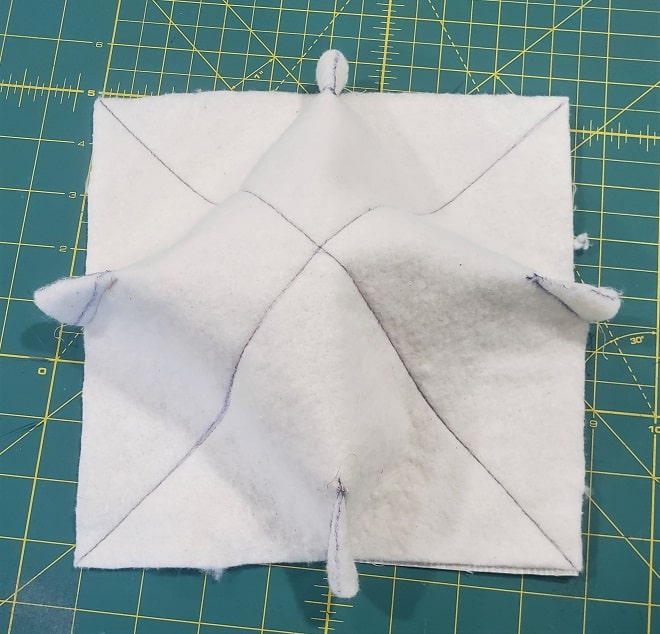
Trim the excess triangle off leaving a 1/4″ seam allowance.
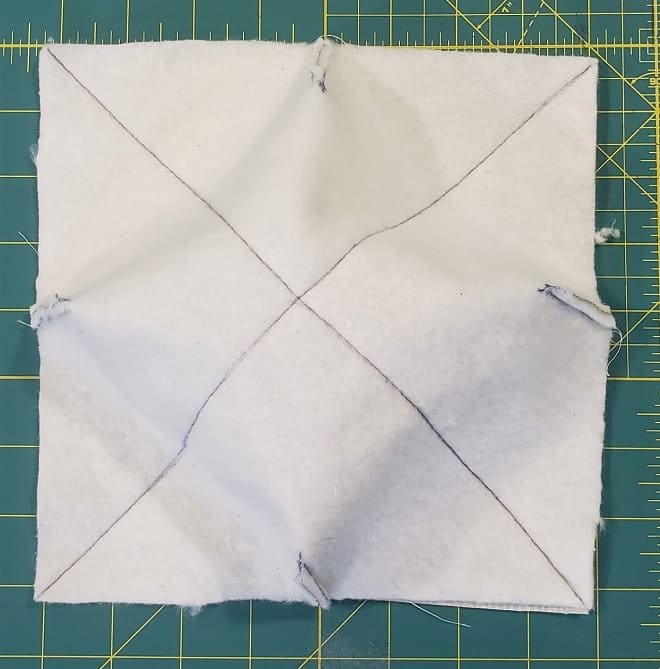
Place two squares together right sides touching. (your batting should be facing you)
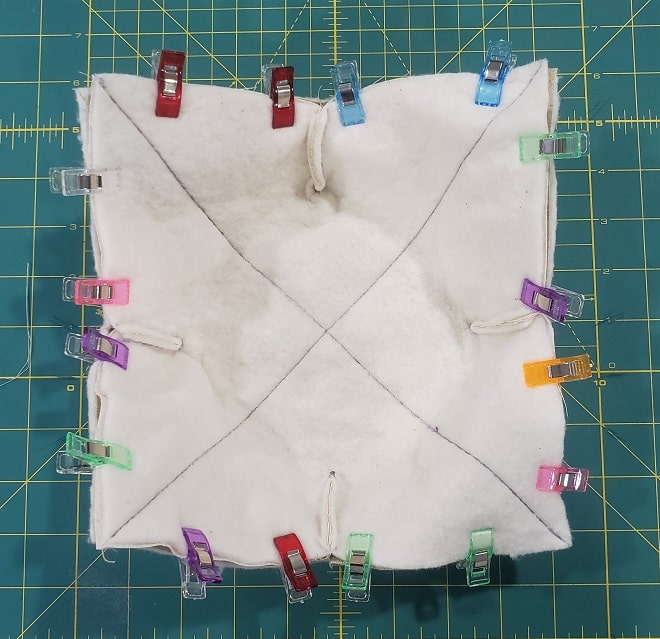
Sew around the outer edge leaving about a 3″ opening on one side.
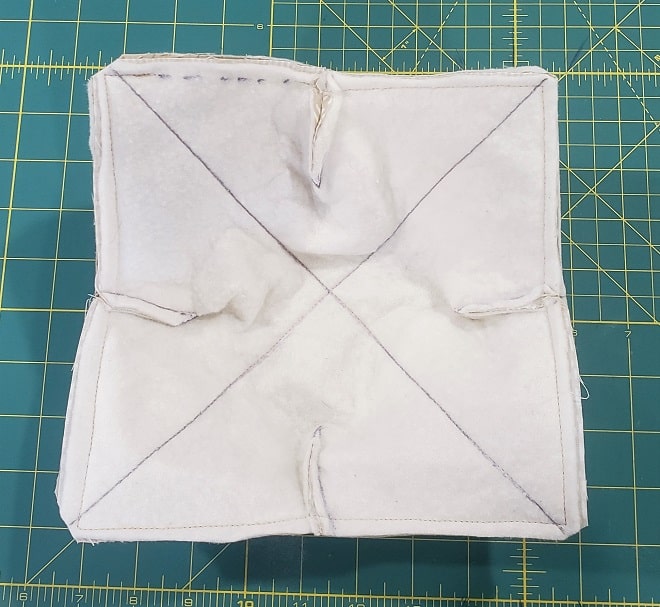
Clip corners to reduce the bulk and turn right side out through the hole you left.
Iron flat and topstitch around the entire edge, closing the hole you left.
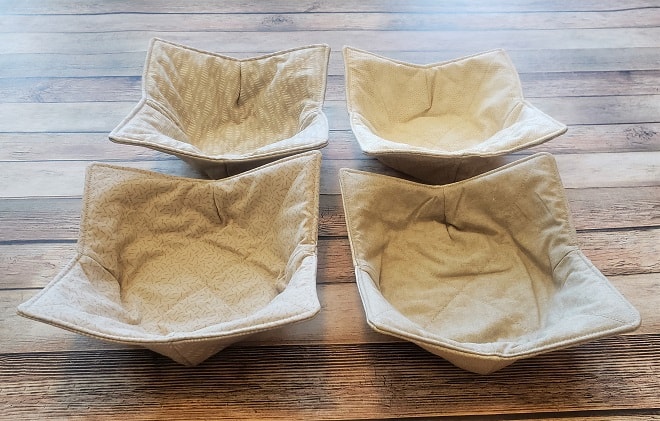
That’s it!
Aren’t these great! I made some for my family a few years ago and we use them all the time, so I’m hoping my mother in law likes them just as much.
Now, on to the hot pads…
Is there a rule of thumb about what size to make hot pads? Honestly, I don’t know. I just know that I didn’t want to make anything too big. I decided to make these 8″ square.
Now, you could make these with just one fabric for the front and the back, but where’s the fun in that. My mother in law likes things fairly simplistic in design so I kept that in mind and went with a large square in the lower right, small square in the upper left and rectangles along the top and left sides.
I did the exact same design for the matching trivets. I made two 10″ square ones and one 10×13″.
What to cut:
Hot pads, 4 6 1/2″ squares
4 2 1/2″ squares
8 2 1/2 x 6 1/2″ rectangles
4 8″ squares batting
4 8″ squares insulbright
4 11″ squares backing fabric
Square trivets, 4 8″ squares
4 3″ squares
8 3″ x 8″ rectangles
4 10″ squares batting
4 10″ squares insulbright
4 13″ squares backing fabric
10×13 Trivet, 1 8 x 11″ rectangle
1 3 x 3″ square
2 3 x 8″ rectangles
1 10 x 13″ rectangle batting
1 10 x 13″ rectangle insulbright
1 13 x 16″ backing fabric
Start by deciding on the layout of each of your hot pads. Since I have four different fabrics, I wanted to use each one on the front side.

Flip the top left square down over the rectangle along the left side and flip the upper rectangle down over the lower right square. Pin together, then sew.

Press the seam on the smaller strip towards the bottom. Press the seam on the larger piece towards the top. This is so that the seams nest when you sew these two pieces together.
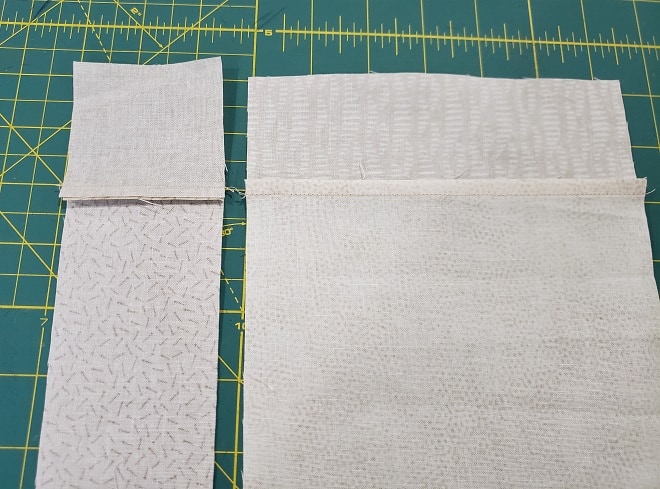
Now sew these two together. Press seams towards the larger piece.
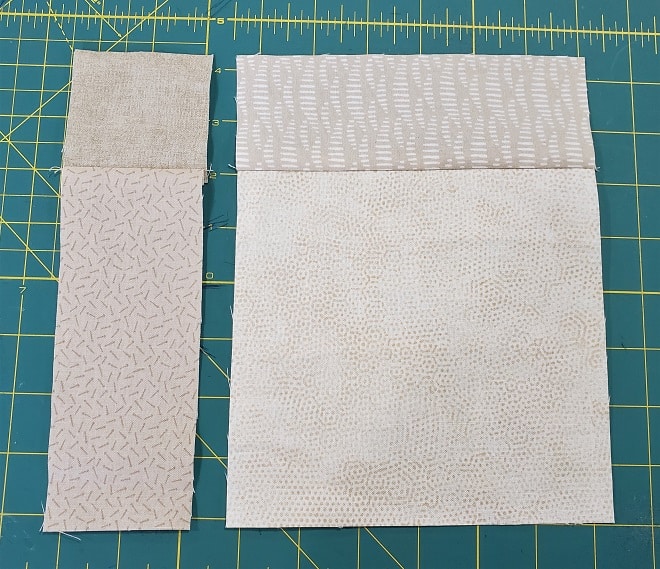
Trim your block down to 8″.

Grab your backing piece and mark 1 1/2″ in all the way around.

Place 1 piece of insulbright inside the square you drew, then a piece of batting.

Place your quilt block over the top.
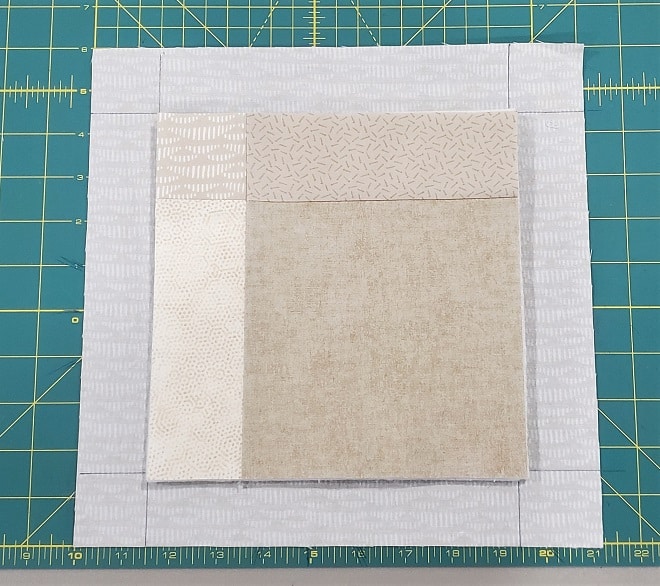
Pin in place.
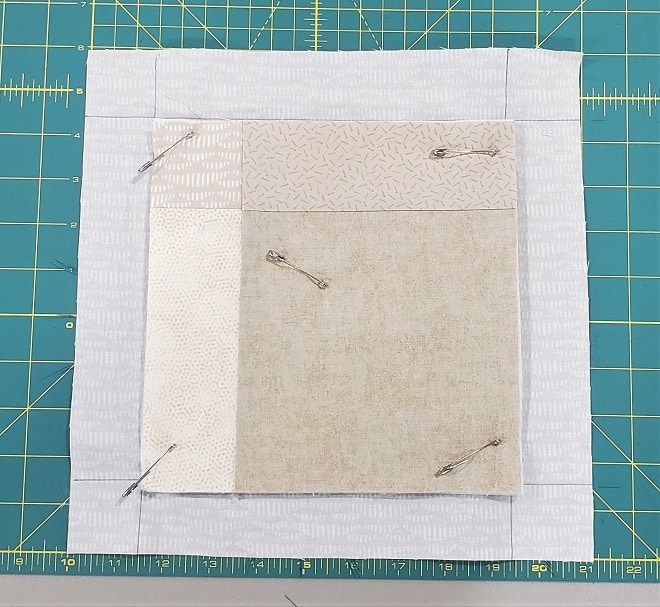
I didn’t want a lot of quilting because I think it makes it too stiff, so I stitched 1/4″ on either side of the seams.


Trim your backing fabric so it’s 1″ wider than your top. I have this handy ruler that is 1″ wide, so I just but it up next to the top and trim the excess that way. You could choose to just make your backing fabric a little smaller, but I wanted to make sure it was big enough in case anything shifted while quilting it.

I like to self bind whenever possible. It’s just easier for me. Fold your binding in half so it just touches your top.

Now fold again so it covers the edge of your top. Place clips to hold in place. Keep this double fold in place clear to the end of your square.
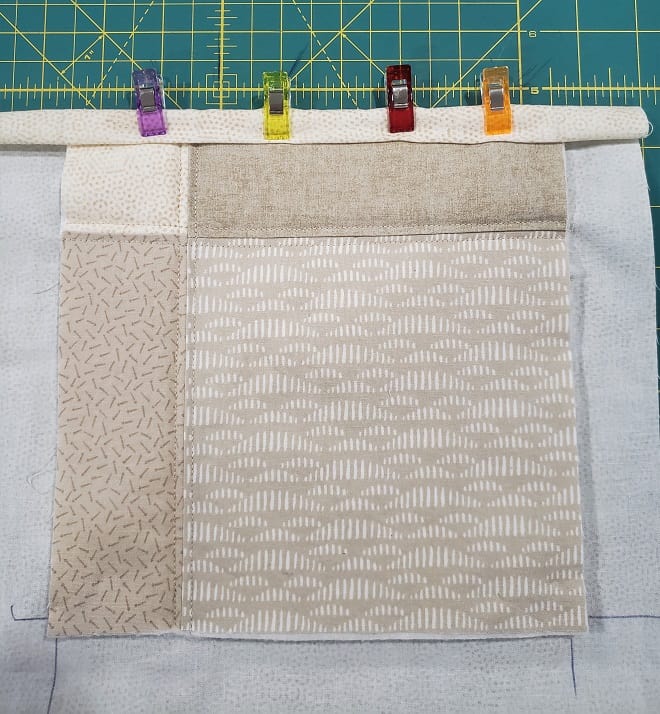
Fold the end at a right angle.

Now take the next side and fold in half so it’s touching the top.
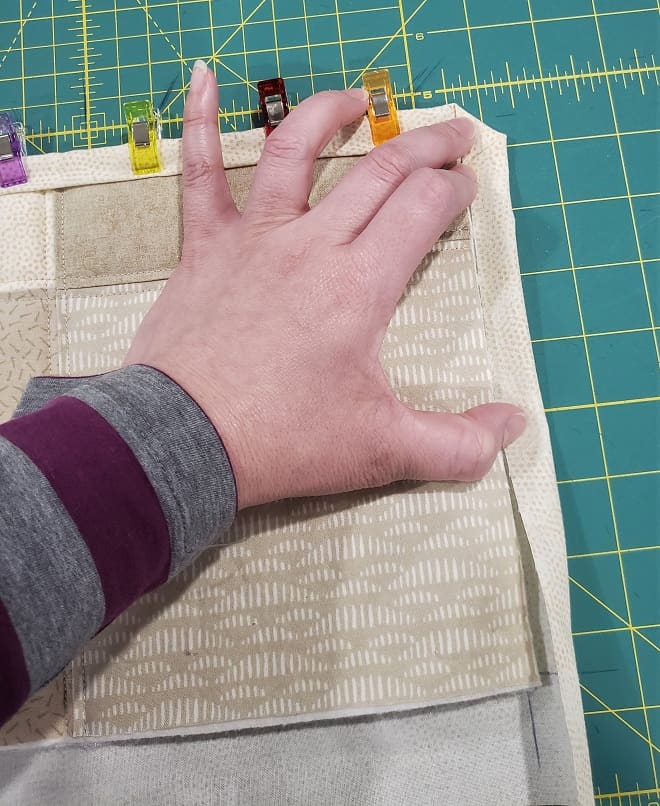
And fold again to cover the edge. See how it gives you those nice mitered corners?
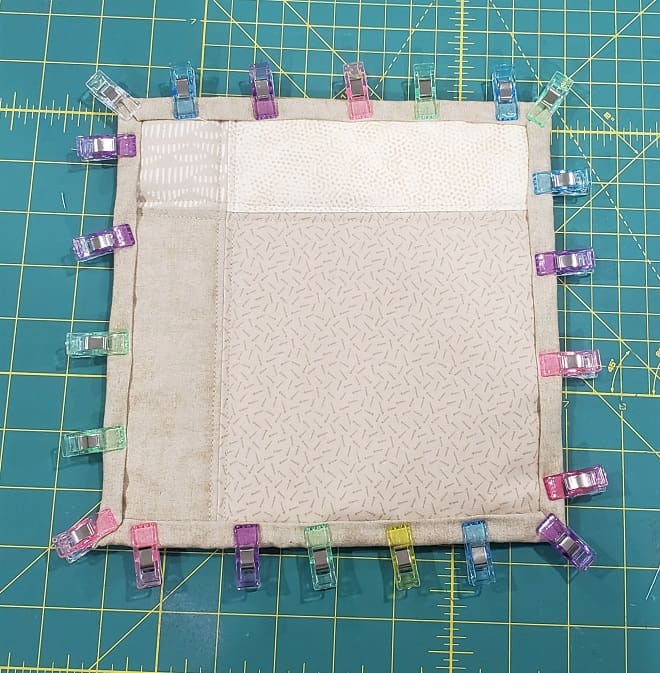
Repeat until you’ve gone around the entire hot pad.
Sew the binding down. How did I forget to take a picture of this?
That’s it! One set of hot pads! The instructions are the same for the matching trivets. 😊
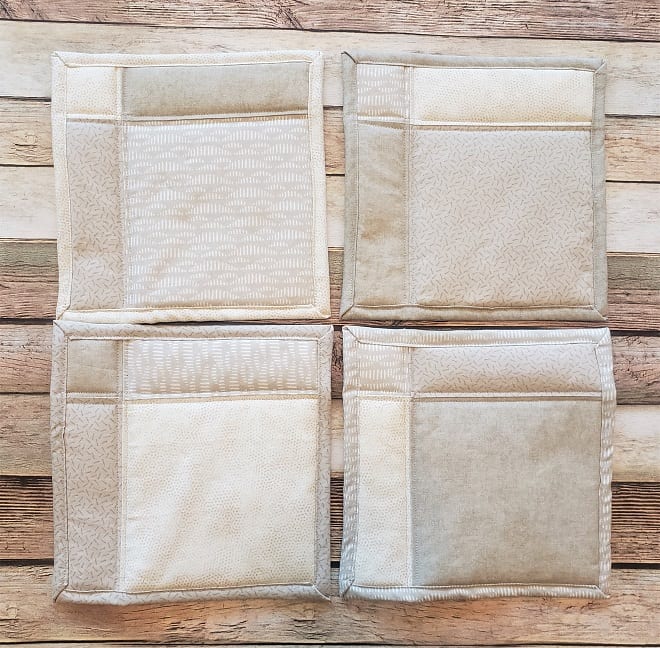
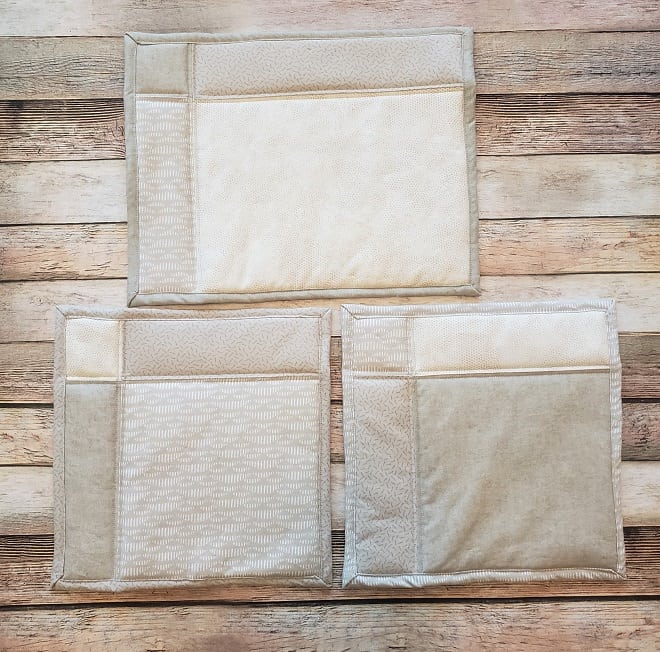
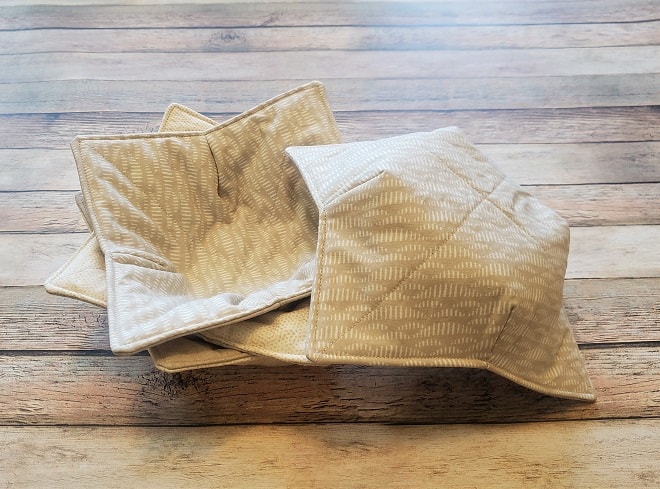

What do you think? Know anyone who would love a set like this for Christmas?

Like what you read? If you’d like to keep up to date with my sewing journey, sign up for my newsletter. I promise not to spam you with a bunch of unwanted emails.
Enjoy this blog? Please spread the word.